
The DiviMerc Payment Gateway Icons extension lets you add custom logos to WooCommerce payment methods or replace their existing icons without writing code.
Important Note:
- The payment gateways you want to customize must be enabled.
- The extension is disabled by default and must be enabled manually.
Enable the Payment Gateway Icons Extension #
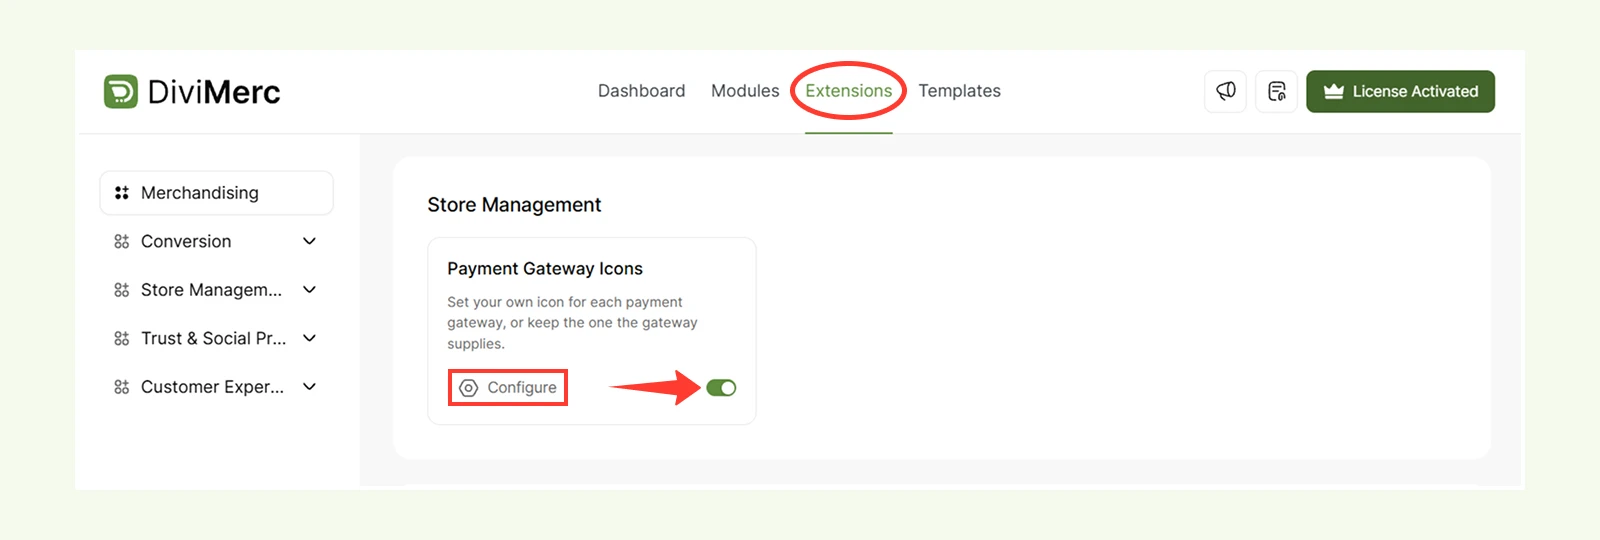
- Go to your WordPress Dashboard.
- Navigate to DiviMerc > Extensions > Store Management.
- Find Payment Gateway Icons and enable it.
- Click Configure to access the Gateways settings.
Gateways Settings #
The Gateways section lists all enabled WooCommerce payment methods, allowing you to add, replace, or restore their icons.
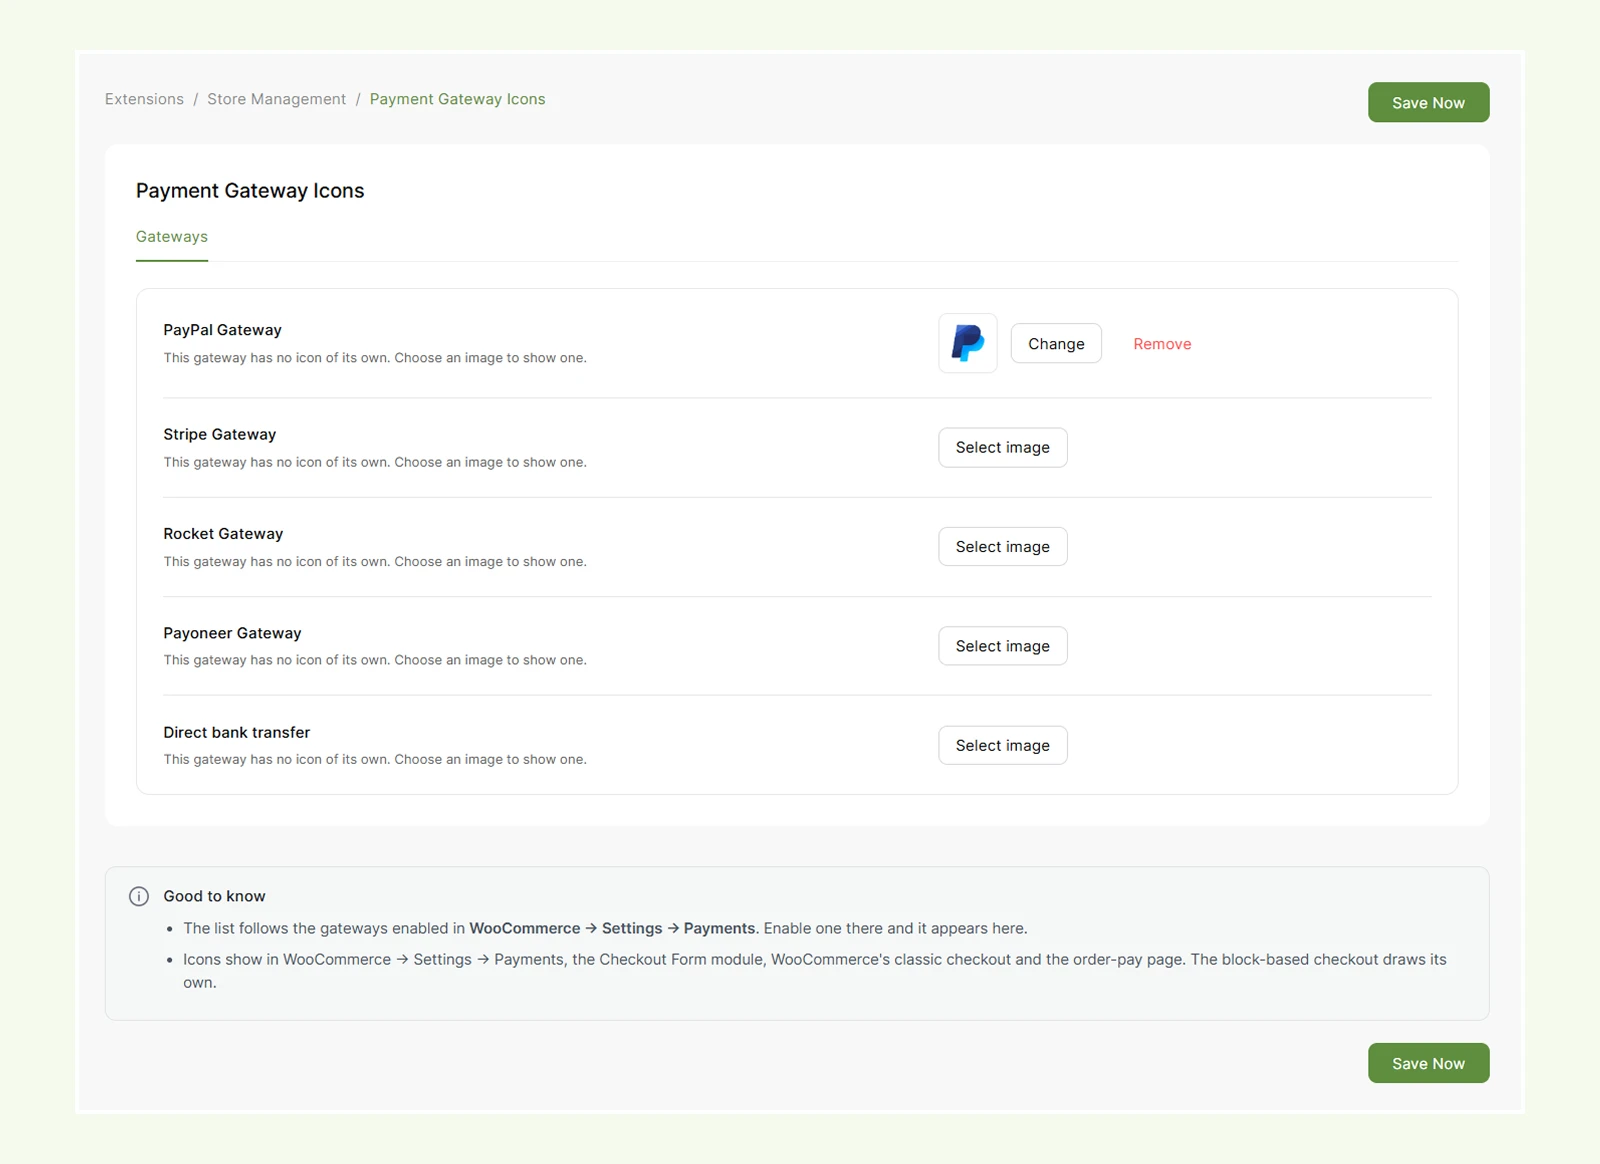
- Select image: Add an icon to a payment gateway that doesn't have one.
- Change: Select a different image to replace a previously added custom icon.
- Use default: Remove the custom image and restore the gateway's default icon, if available.
- Save Now: Save your changes to the gateway icons.
To add or change an icon, click the appropriate button, select an image from the WordPress Media Library or upload a new one, and click Save Now.
Note:
- The available buttons depend on whether the gateway already has an icon or a custom image.
- Each gateway supports one custom image. If a gateway displays multiple logos, overriding it replaces them with your selected image.
- For better results, use a PNG or SVG image with a transparent background and minimal empty space.
- To customize icon size, position, spacing, and appearance in the DiviMerc Checkout Form, use the Gateway Icons settings under the Payment component's Design tab.
Disabling the extension restores the gateways' default icons while preserving your saved customizations.
Need Help? #
If you have any questions or need assistance, contact our support team at [email protected].


